
I’ve been a huge fan of Screaming Frog SEO Spider for a number of years now. One would be hard-pressed to find a finite number of use cases for the tool. I also very much appreciate Dan Sharp and his team’s continued focus on innovation and improvement with the tool as well.
I also love a lot of the other crawler tools that have popped up in its wake like Luman and URLProfiler. Now I’m also getting to know On-Page.org as well and I encourage you to give their free trial a spin.
URL Profiler though has planted itself as the go to tool for our content auditing process. Although, I’d encourage you to check out Moz’s new content auditing tool as well.
From what I know of each of these tools is that they all have their own strengths, weaknesses and use cases. For example, if we’re doing a population (vs. sample-based) content audit on millions of pages, we’d typically use DeepCrawl then batches of 50k URLs in URLProfiler.
However, despite how awesome the SaaS crawlers are, I always feel like I “know” a website better when I do a Screaming Frog or URLProfiler crawl. Also one of our team members has built to bring headless browsing features to Screaming Frog, so that is an added incentive for us to make it work. I’m well aware that this is more a reflection of how well I know these products than the shortcomings of the other products. Nonetheless, it’s more important to do what it takes to do work that we’re PROUD of than to use the most sophisticated tool.
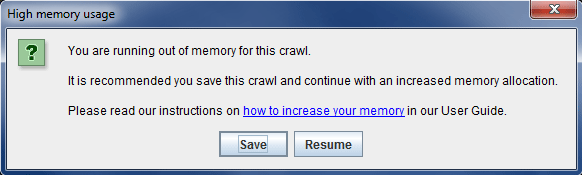
All that said, how many times have you been frustrated by this dialog box?
Why Does That Happen?
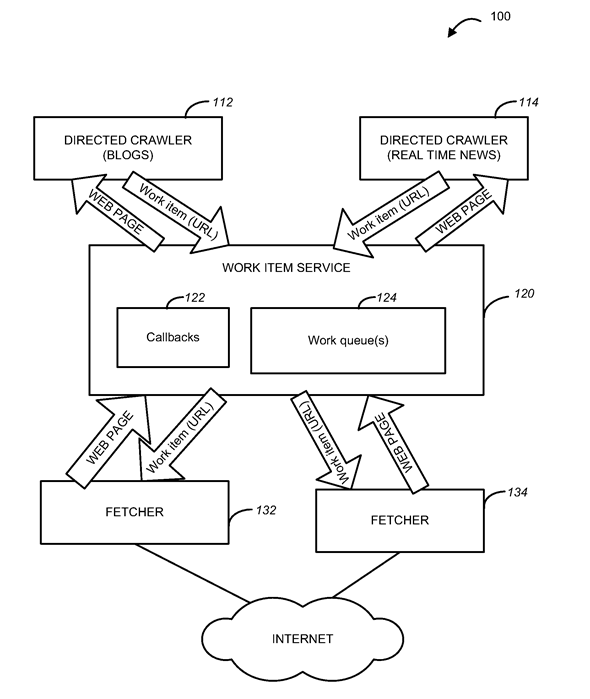
Technologically, cloud-based crawlers have a distinct advantage over desktop crawlers. Typically, cloud-based crawlers operate using a series of nodes that distribute the crawl. Each of these nodes runs a small application managed by another centralized application that makes the crawling fault-tolerant. Also cloud-based crawlers are saving their crawl data to a database so memory overhead can be kept very low. Finally, cloud-based crawlers have a virtually infinite set of computing resources to pull from to facilitate the crawl. In summation, cloud-based crawlers can be distributed, faster and more resistant to failure. The diagram below from an eBay patent gives a visual representation on of how a cloud-based distributed crawling system typically works.
Conversely, desktop crawlers are limited by the specs of your computer and they run in memory. If your machine has 4 CPU cores, 8 GB of RAM, you’re running Windows 8, have 50 tabs open in Chrome and have a bunch of TSRs running, the Frog is very likely to actually be screaming in pain while it’s crawling for you. A desktop crawl is inherently a resource limited crawl; this is why it’s prone to crash or run out of memory when it crawls too many pages.
Screaming Frog’s advantage over URL Profiler is that, once it reaches the resource limitation, it will ask you if you’d like to save you crawl and then keep going. URL Profiler on the other hand will just crash and all of that data is gone. Typically, I watch the usage of processes in Task Manager and start closing other applications when CPU or memory get too close to 100%.
Sounds like the odds are against you for big sites with desktop tools? Sure, they certainly can be, but none of the cloud-based tools get me the combination of data I want just the way I want it. So what can we do?
Enter Amazon Web Services
What we’re going to do now is run Screaming Frog and URLProfiler on Amazon Web Services. This will allow us to run the tools on an isolated machine that is has far more resources and likely more consistent speed than anything you or I have in our respective offices. My own machine, which is a fantastic Samsung ATIV-9, has 2 cores, 8 GB RAM and 256 SSD. On AWS we can configure a machine that has 40 cores, 160 GB and virtually infinite space. We won’t, because that’s overkill, but you get the point.
Odds are that you’ve heard of Amazon Web Services (AWS) and you may throw it around as an option for how you can do fancy things on the web. Or perhaps you’ve read about how it powers many of the apps that we all use every day. Whatever the case, the long and short of it is Amazon Web Services gives you virtual computing resources in a variety of different ways. Effectively, you can host a series of servers, databases, storage space, et al in myriad configurations and manipulate them programmatically on-demand. For example, when you fire up a crawl in DeepCrawl, it takes a few minutes for it to get started because it has to launch a number of EC2 instances to facilitate that crawl.
That use case doesn’t apply to what we’re doing here, but you now have a picture of how those tools use AWS to their advantage. In this case, we’ll spin up one box and configure it to just run exactly what we need.
As you can see below, there are numerous different services that Amazon offers. The one we will be focusing on most is Elastic Computing Cloud, commonly referred to as EC2.
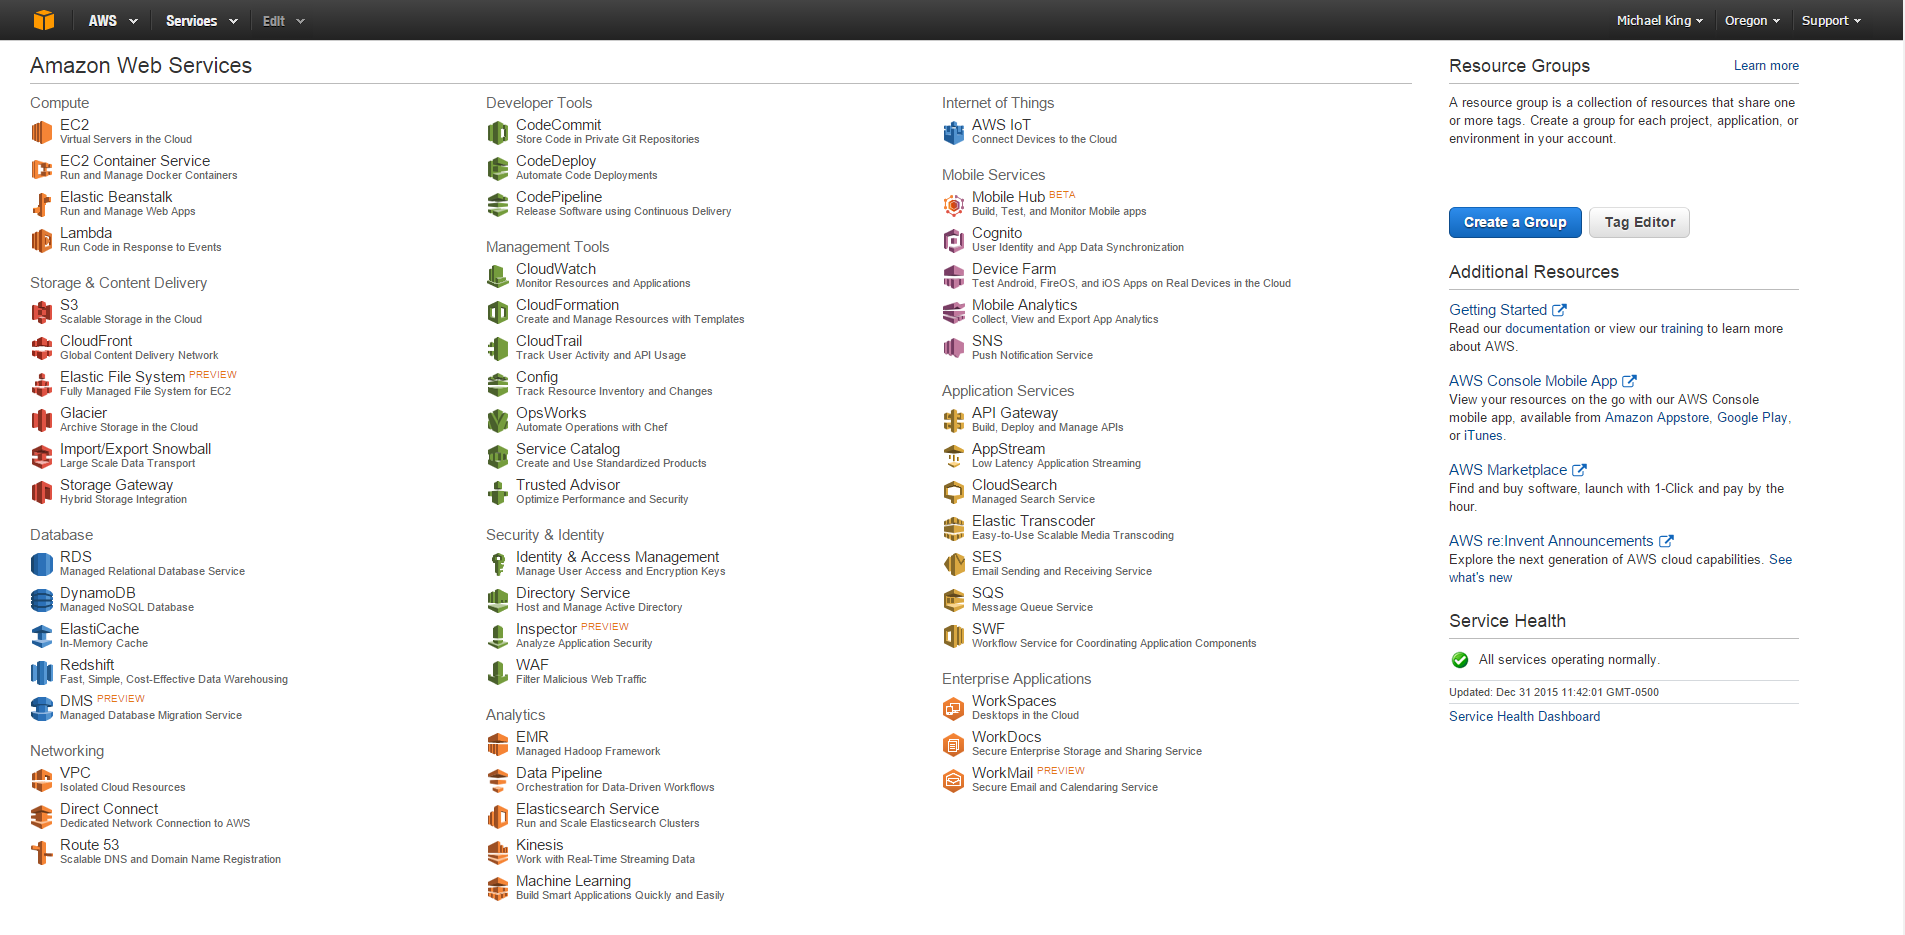
You’ll also need to know a little bit about VPC to get access to your servers remotely, but we won’t go too deep into that.
Although the list of services above can appear daunting, I promise you the process of getting setup will be pretty painless. Shall we?
How to Set Up a Windows Box on AWS with Screaming Frog and URLProfiler
To get yourself going on Amazon Web Services, we’ll effectively be setting up an instance of a Windows Server, installing the programs on it, running our crawls, saving an image of that instance and shutting it down. Here we go!
- Login to Amazon Web Services – You’ll be using you Amazon account for this. Amazon gives a free 12 months of AWS service to first time users. Be advised that the free tier only applies to certain usage types. Instances in the free tier won’t be adequate for what we’re looking to accomplish, but pricing beyond those usage types is quite reasonable.
- Launch your Instance – First, make sure you’re in the right availability zone (in the upper right, next to my name). North Virginia is the cheapest of the data centers. After that click Launch Instance.
- Choose your AMI – An Amazon Machine Image (AMI) is a pre-installed set of configured software. Rather than setting up a blank machine and needing to install an operating system, Amazon allows you to clone a fresh machine with an Operating System of you choice already installed. You could set up your own configurations and create your own AMIs as well, but we won’t. In this case we’ll be choosing the Windows Server 2012 R2 Base AMI.
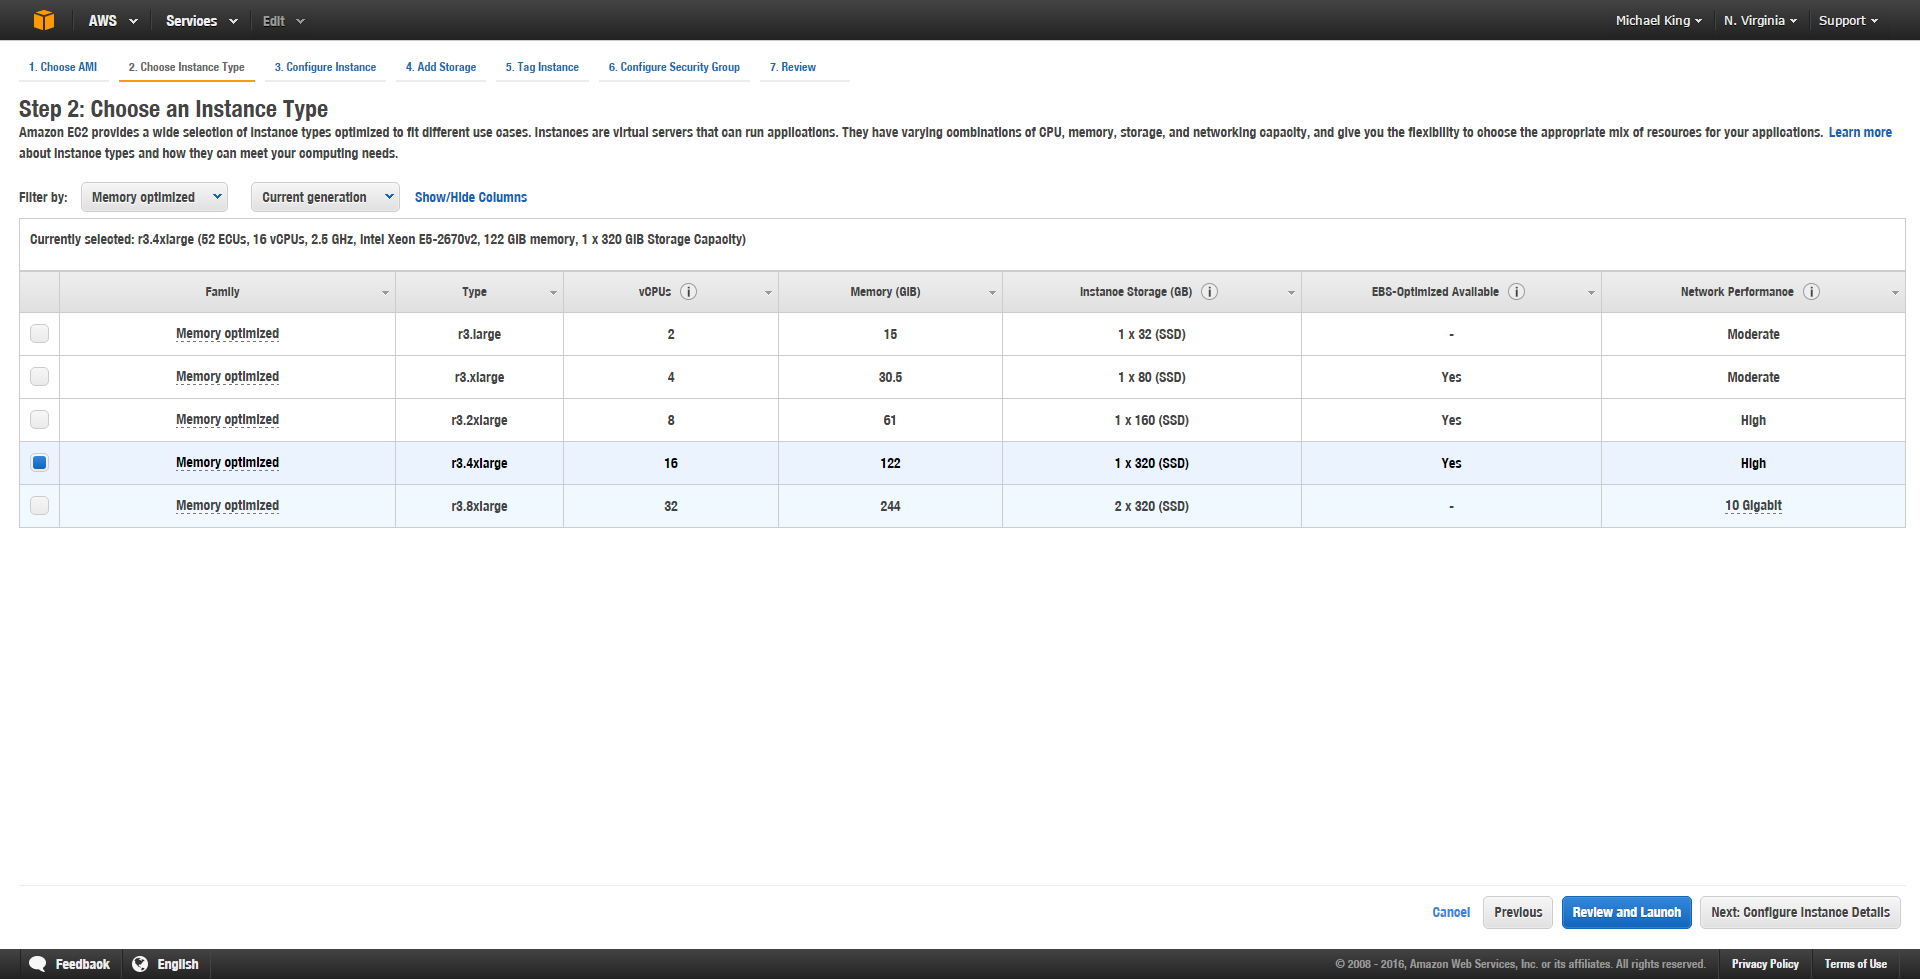
- Choose an Instance Type – This is where you get to choose your computing power. As you can see the free tier (t2.micro) only gives you one core and one GB of RAM. That’d be fine, for a single node, if you’re writing a script that did your crawling, but you’re not, you’re running a full featured memory-hungry Windows application. Go with the r3.4xlarge instance type with 16 cores and 122 GB of RAM and let those programs breathe. You can find out more information on the instance types that AWS offers here. Spoiler alert: The R3 instances are “memory-optimized” and suggested specifically for running analytics programs.
-
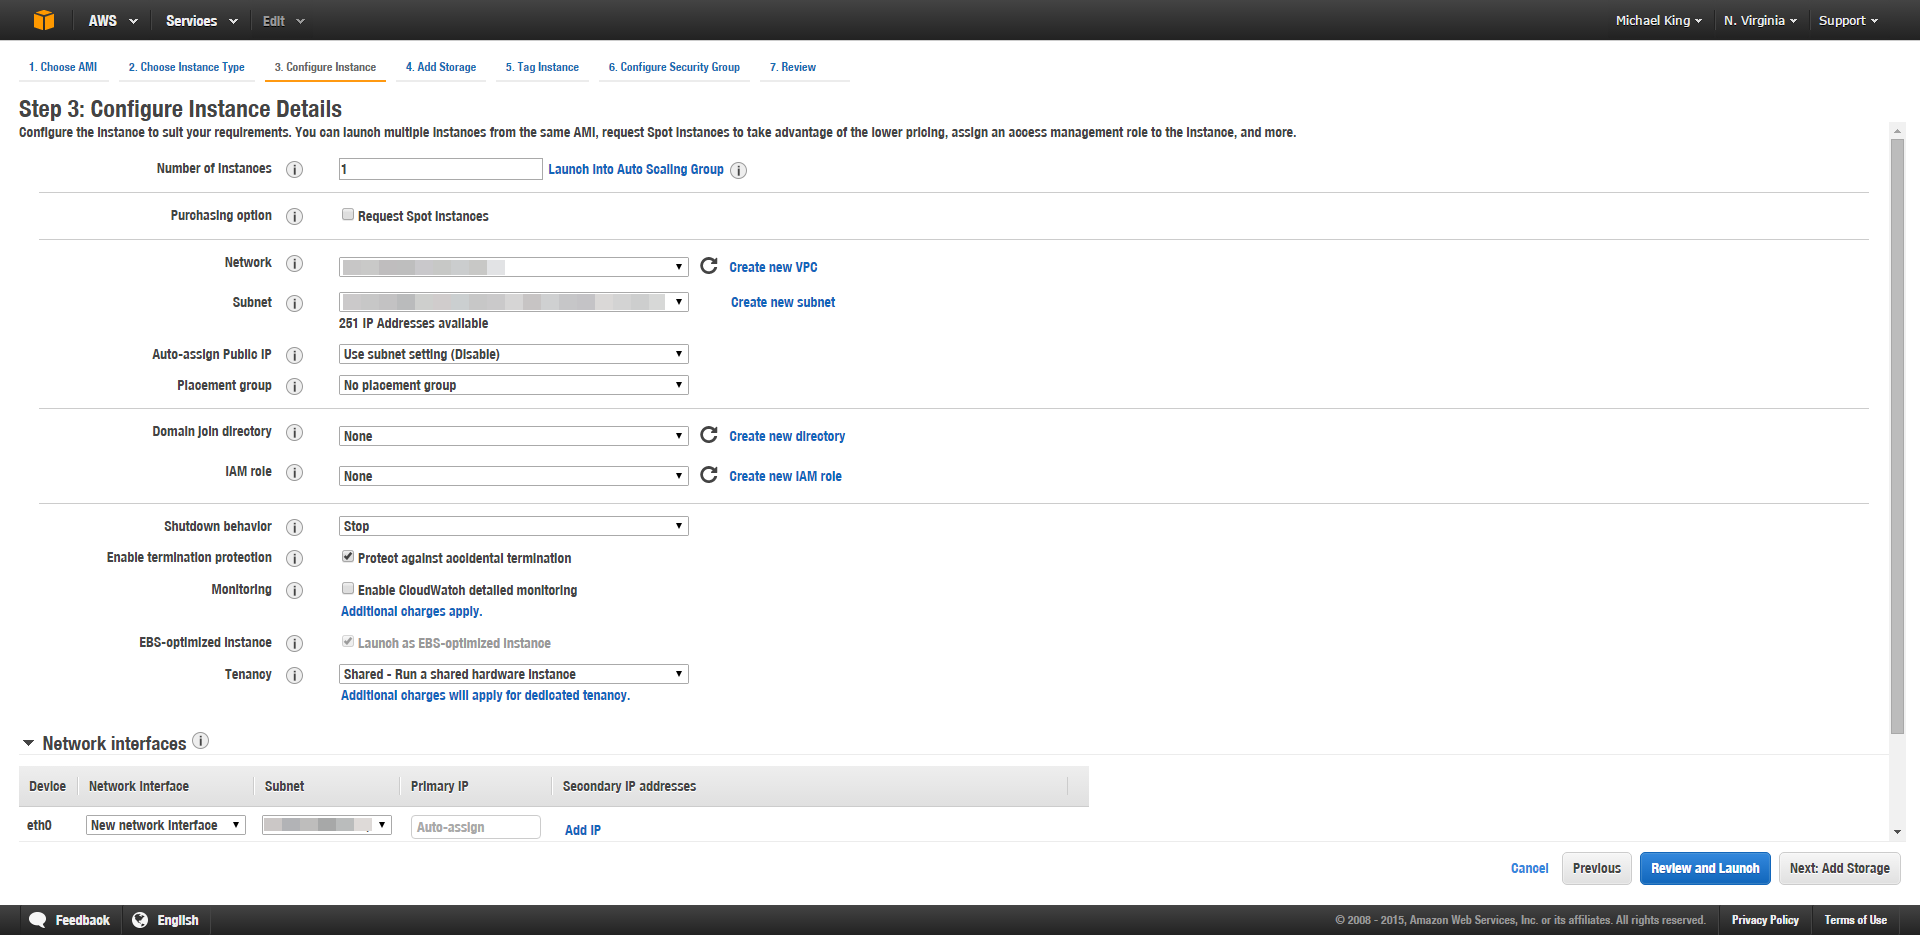
Configure Instance Details – You can pretty much leave these all as defaults. Well, this being your first instance, you’ll have to set up a VPC and configure a network interface so that you can actually login to your Windows server. You should also check protect from automatic shut down since this is your first time playing with AWS; that way you’re sure to not lose any data.
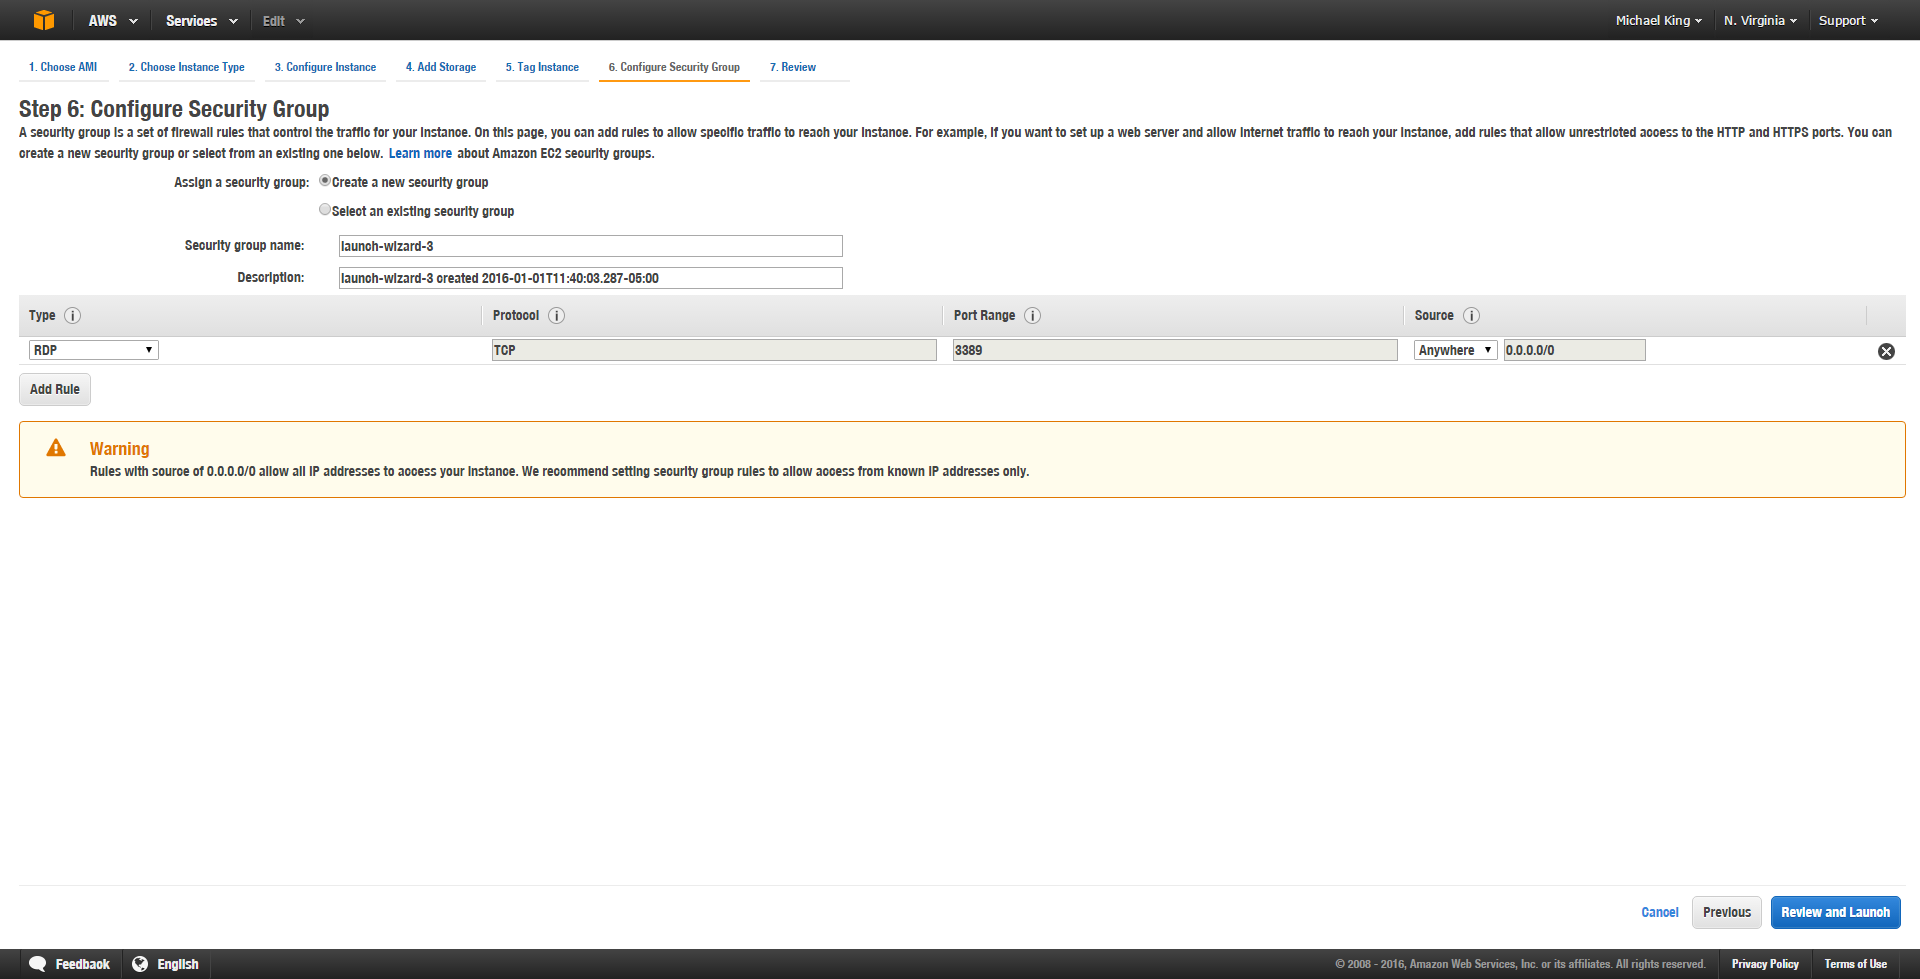
- Configure Security Group – AWS is annoyingly secure. You’re going to need to configure a security group using the launch wizard. Security groups allow you to give access to users based on their IP addresses. However, since you’re not storing anything significant on this box you can go ahead and give the security group access from any IP. Should you start saving anything of value, I’d recommend locking it down to the IPs that only you and your team can access.
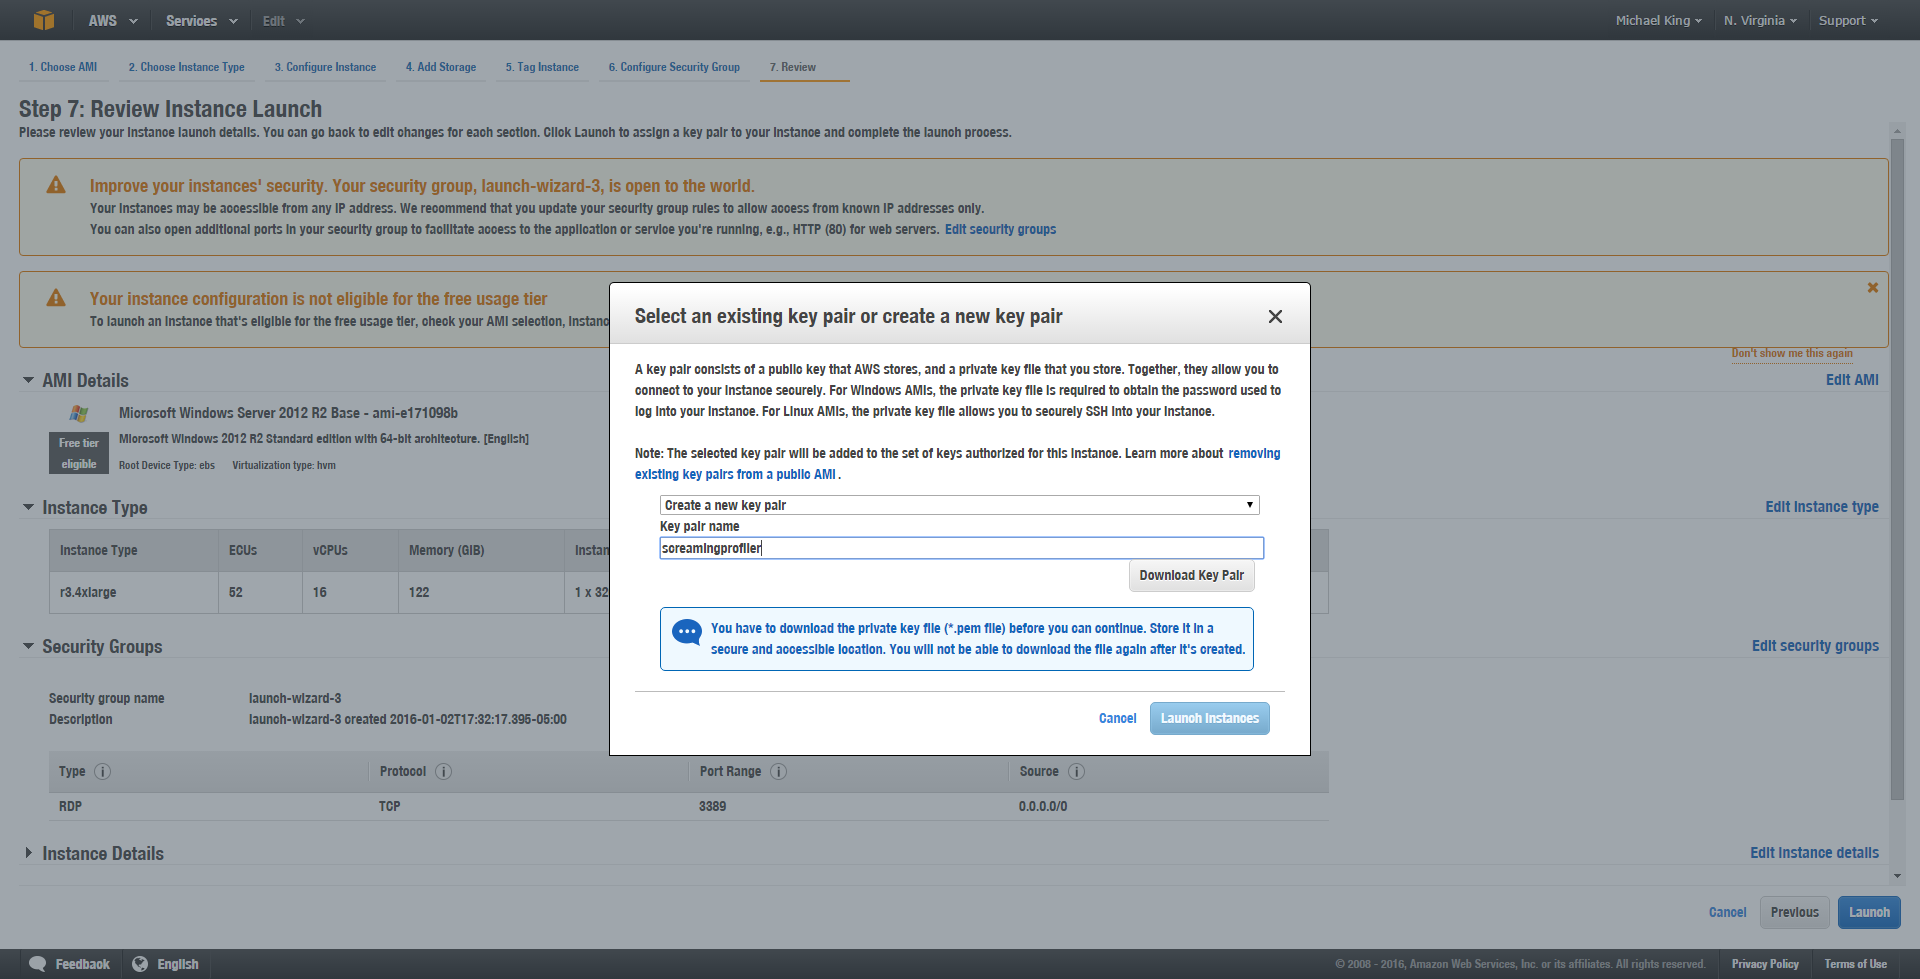
- Review Instance Launch – As with any tool that uses a wizard, you are just making a final check of your configuration at this point. Double check that your screen looks pretty close to this. You should see the two warning indicators at the top if you’ve configured it as I have. Your instance type will be reflective of whatever options you’ve set.
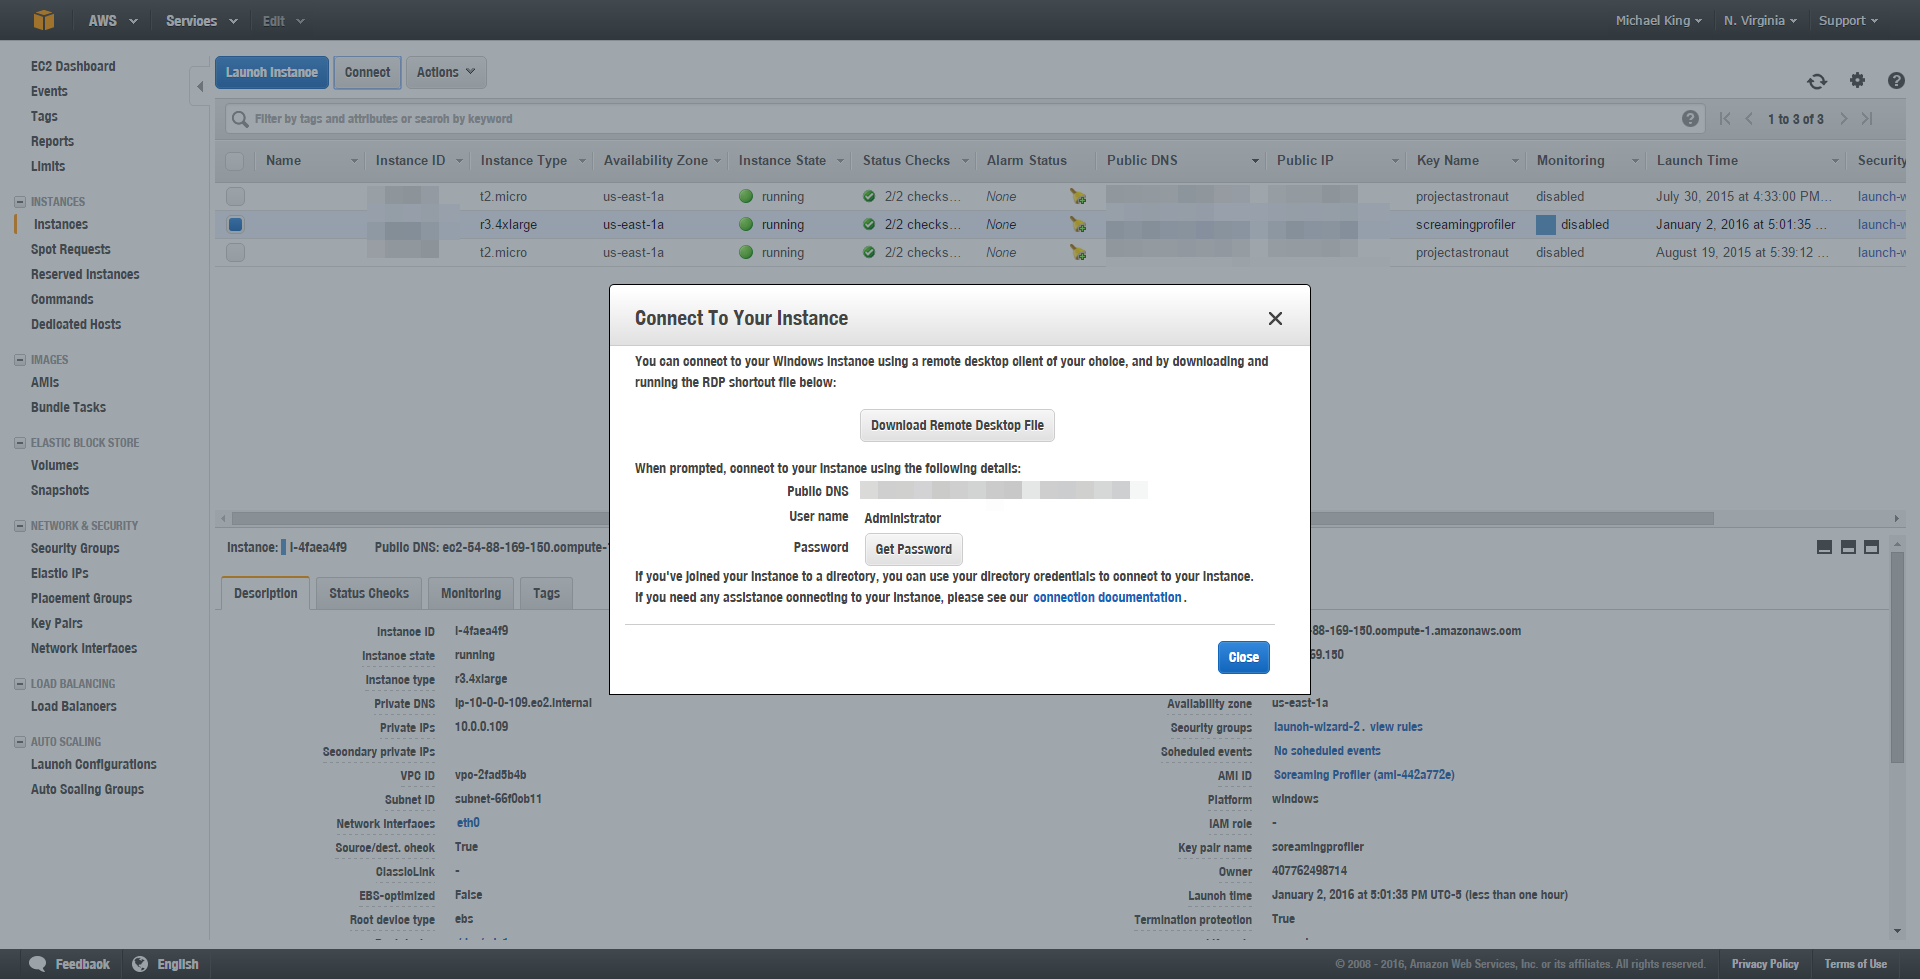
- Create a New Key Pair – A key pair is a public and private key that AWS uses for logging in. For Windows Server, AWS uses this so you can retrieve the administrator password. Create the key pair and download the file.
-
Connect to Your Instance – AWS will give you a configuration file to download in order to connect to your instance using the Remote Desktop application. You’ll also need to upload your key pair first to get the administrator password here. Once you do this, the admin password does not change so as long as you keep it, you won’t need to connect via this interface again. So go ahead and save your password and login using the Remote Desktop Connection app directly. You’ll want to save the file and password to make it easy to share login details with your colleagues.
Once you’ve logged in, you’ll get a window of Windows that looks like this (minus Chrome, URL Profiler and my Screaming Frog crawls directory):
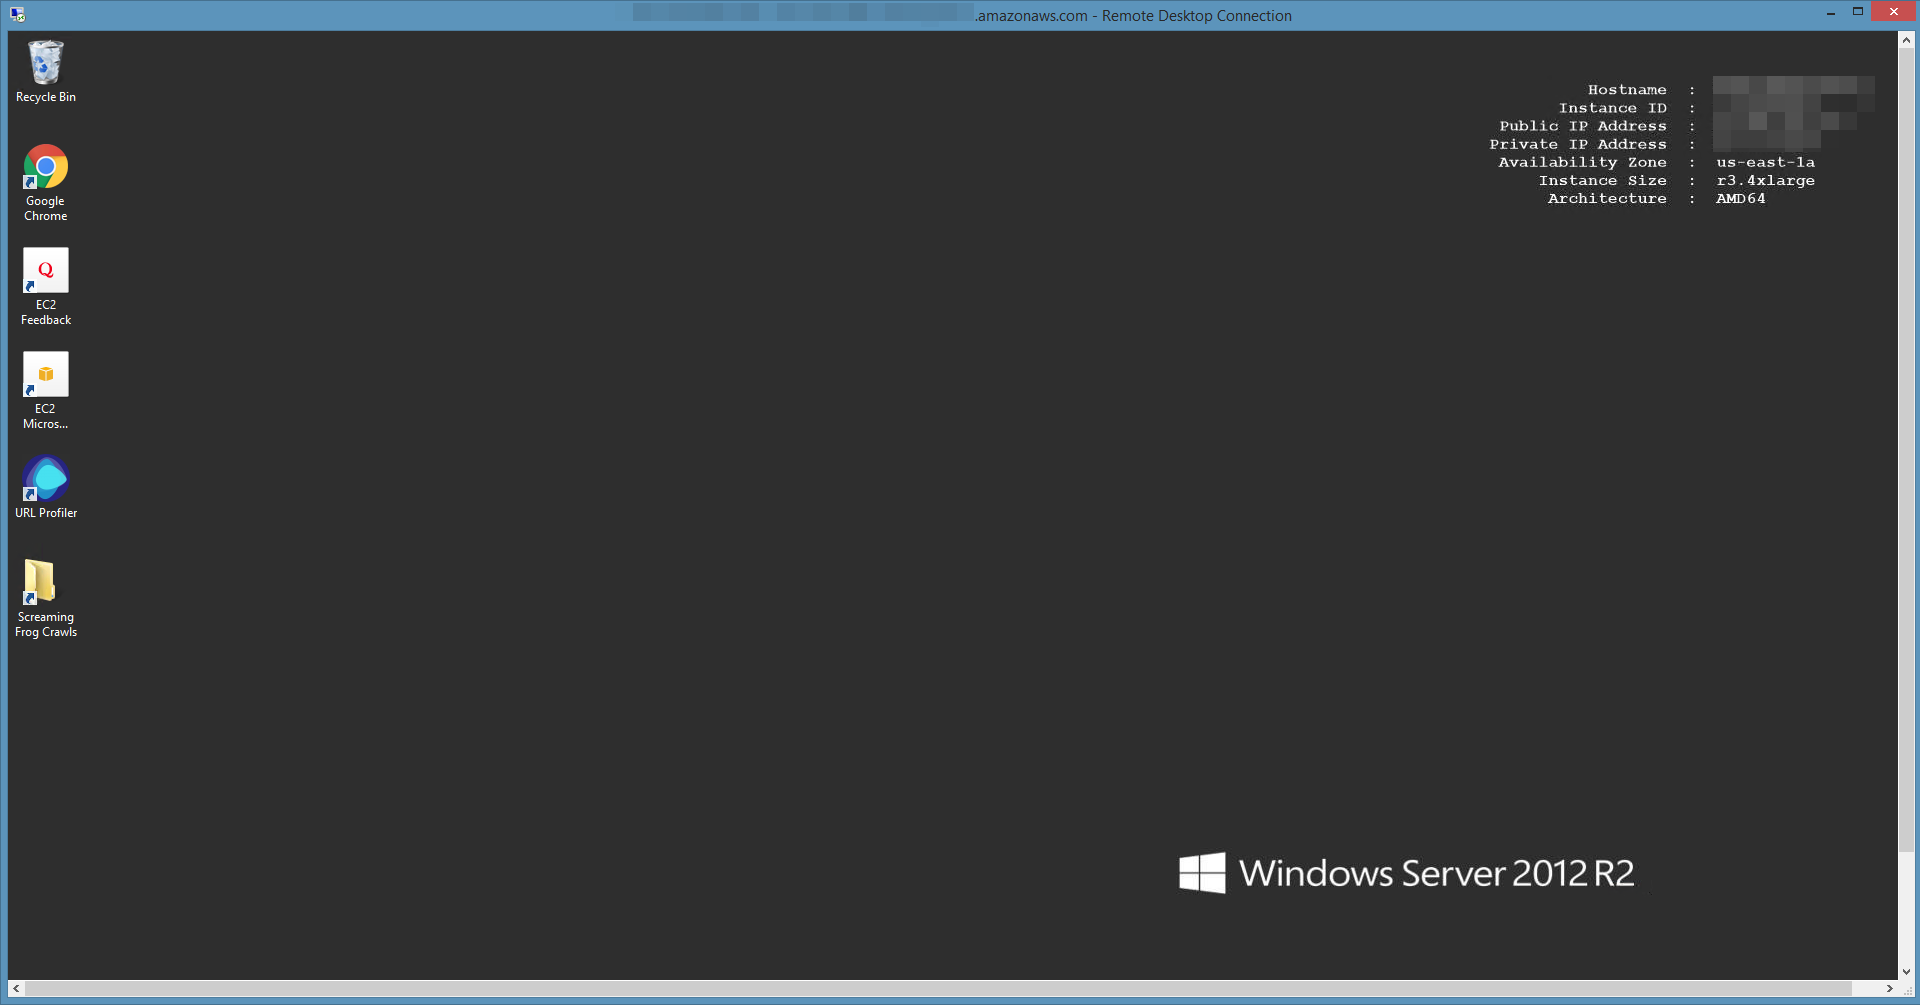
Naturally Windows Server has a different features from the Home versions, but it will operate fundamentally the same as Windows 8. RDC will take over hot keys whenever the window is maximized. If this is your first time use the Remote Desktop application, check out this post on how to map your drives so you can access your local files on the remote machine.
- Install Chrome – The first thing you will want to do is install Chrome so you are not saddled with the abomination that is Internet Explorer.
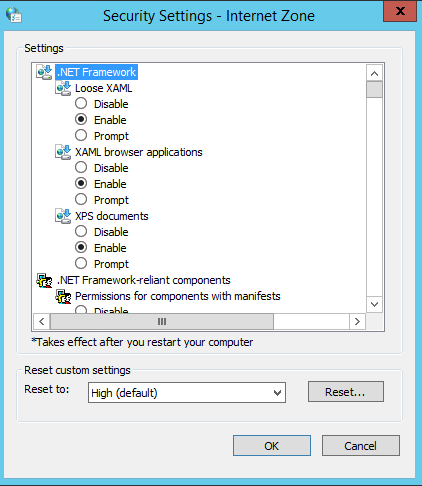
- Change Internet Security Settings – You’re going to run into some issues trying to install Java on this annoyingly “secure” install of Windows Server. Go to Security Settings and configure the custom level by enabling everything. You can go ahead and change it back after Java is installed.
-
Install Java 64-bit – You’ll want to install Windows Offline 64-bit from the manual install page on Java.com. 64-bit is an important because the allocation option breaks Screaming Frog otherwise.
- Install Screaming Frog SEO Spider – Because Screaming Frog requires a little more configuration to get it supercharged, let’s start with that first. Download Screaming Frog and input your license key.
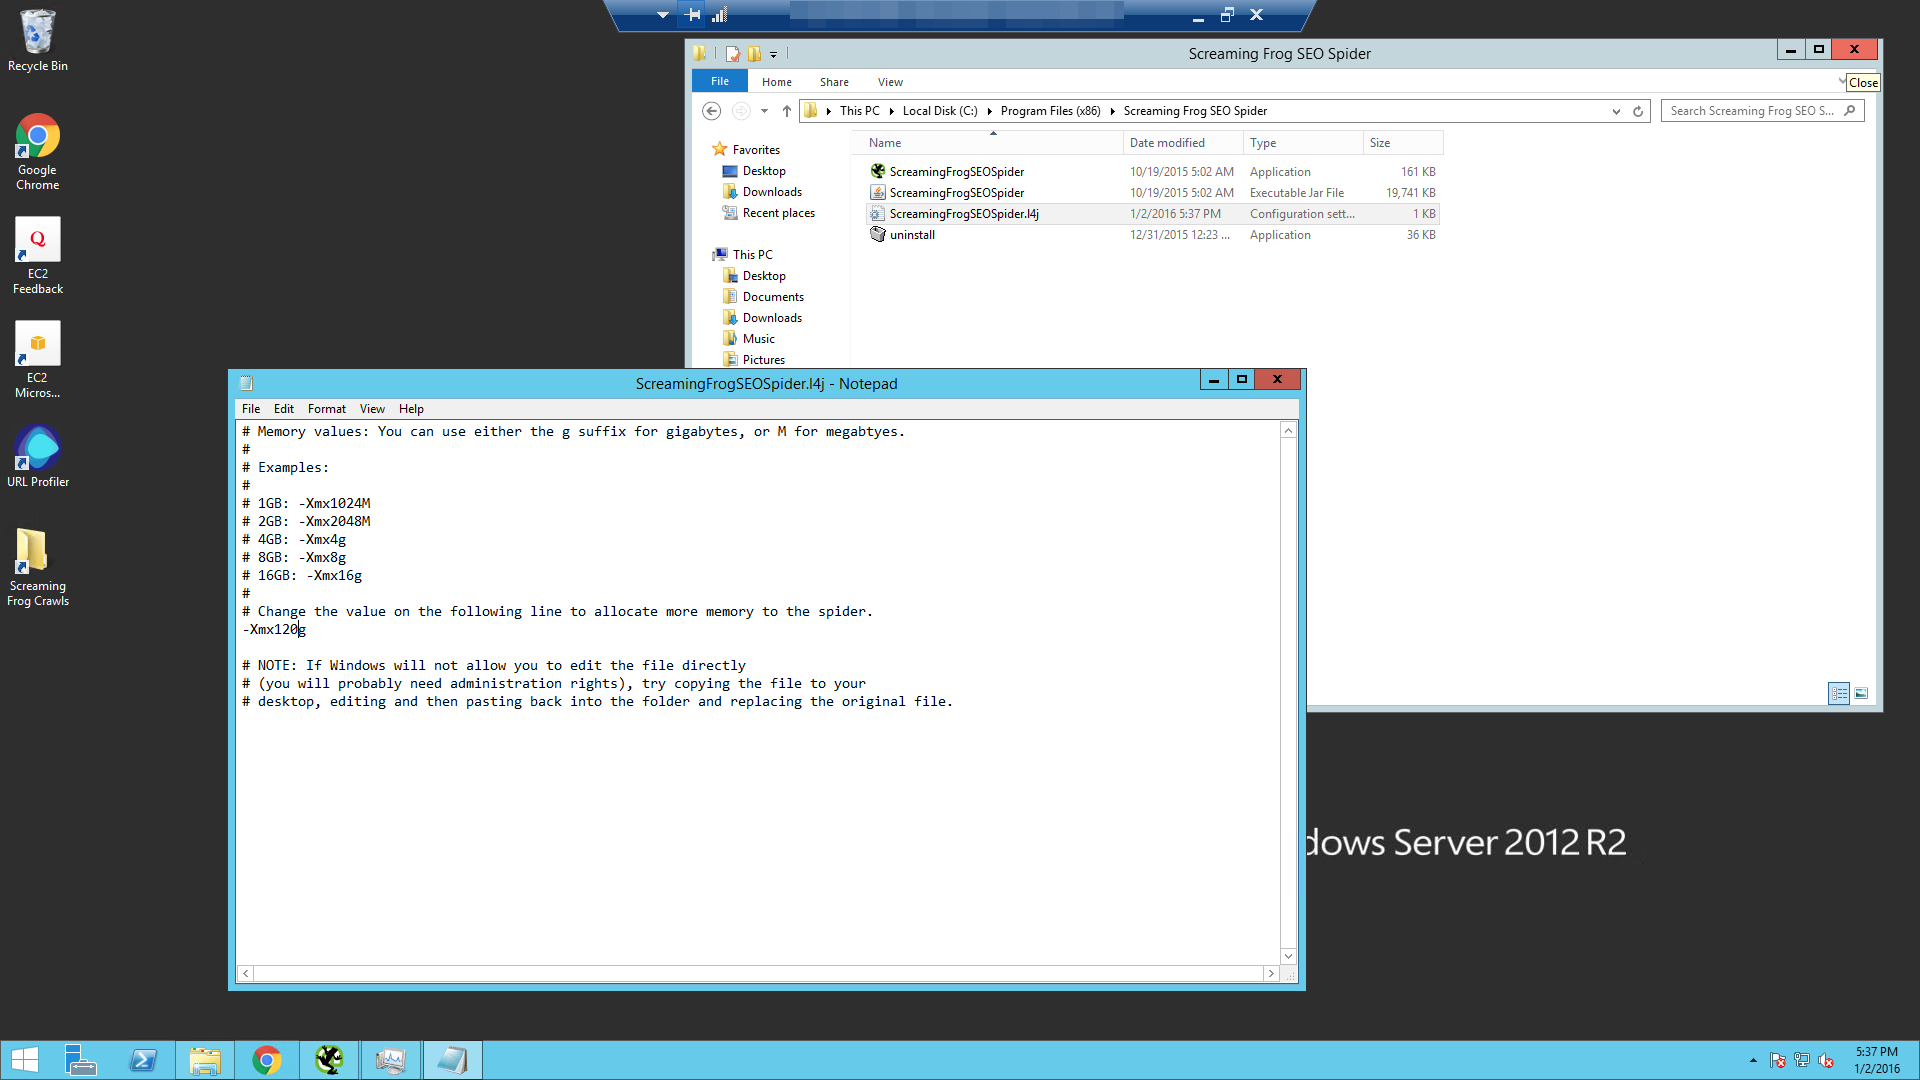
- Maximize Screaming Frog’s Memory Allocation – Screaming Frog has a configuration file that allows you to specify how much memory it allocates for itself at runtime. This ScreamingFrogSEOSpider.I4j file is located with the executable application files. Open it in Notepad and change its default 512MB memory allocation to 120GB. For those that want to know what this does, this value is an JVM environment variable that tells Java to allocate the specified amount of space to Screaming Frog. Screaming Frog simply passes this through to Java when it runs.
- Ramp up the threads – By default Screaming Frog only uses 5 threads at a time to be nice to webmasters. Let’s ramp that up to 15 so we can get this job done quicker.
- Install URL Profiler – Download URL Profiler, install it and put in your license key.
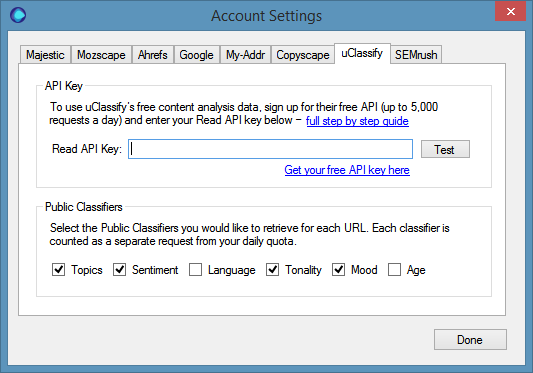
- Setup your API Keys – Setup your API keys for all of the services that you want it to use.
-
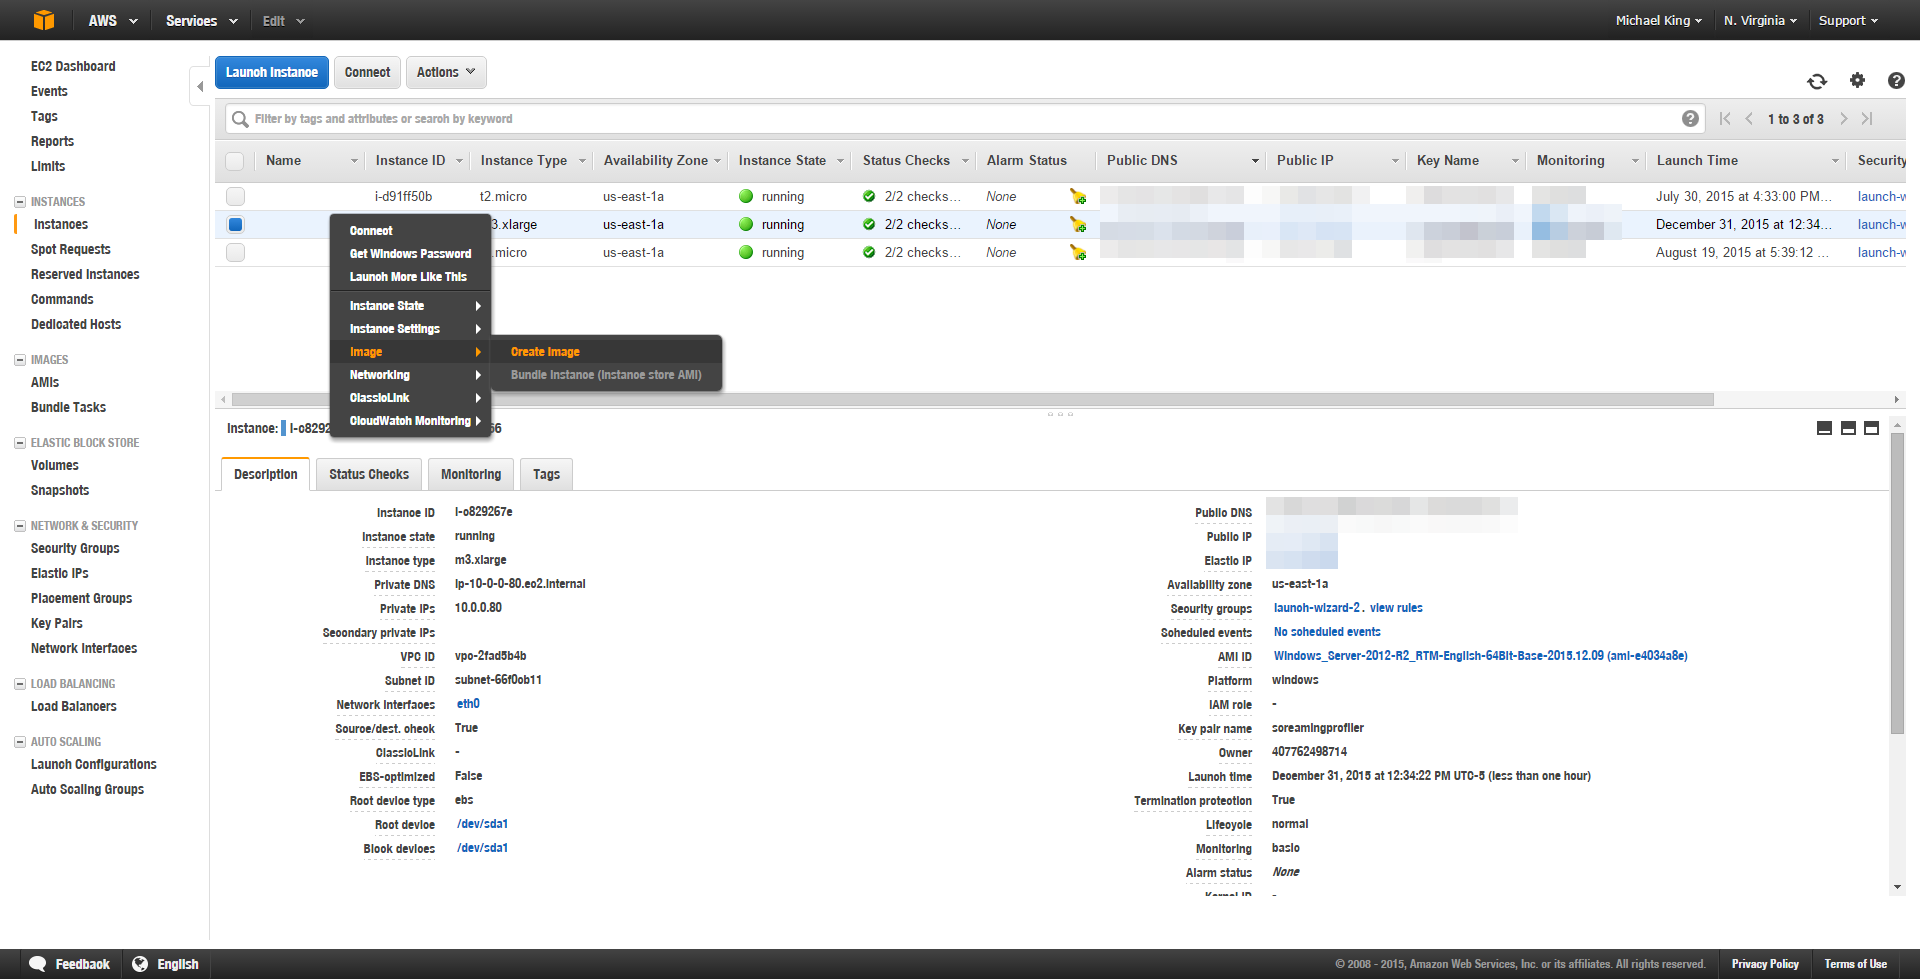
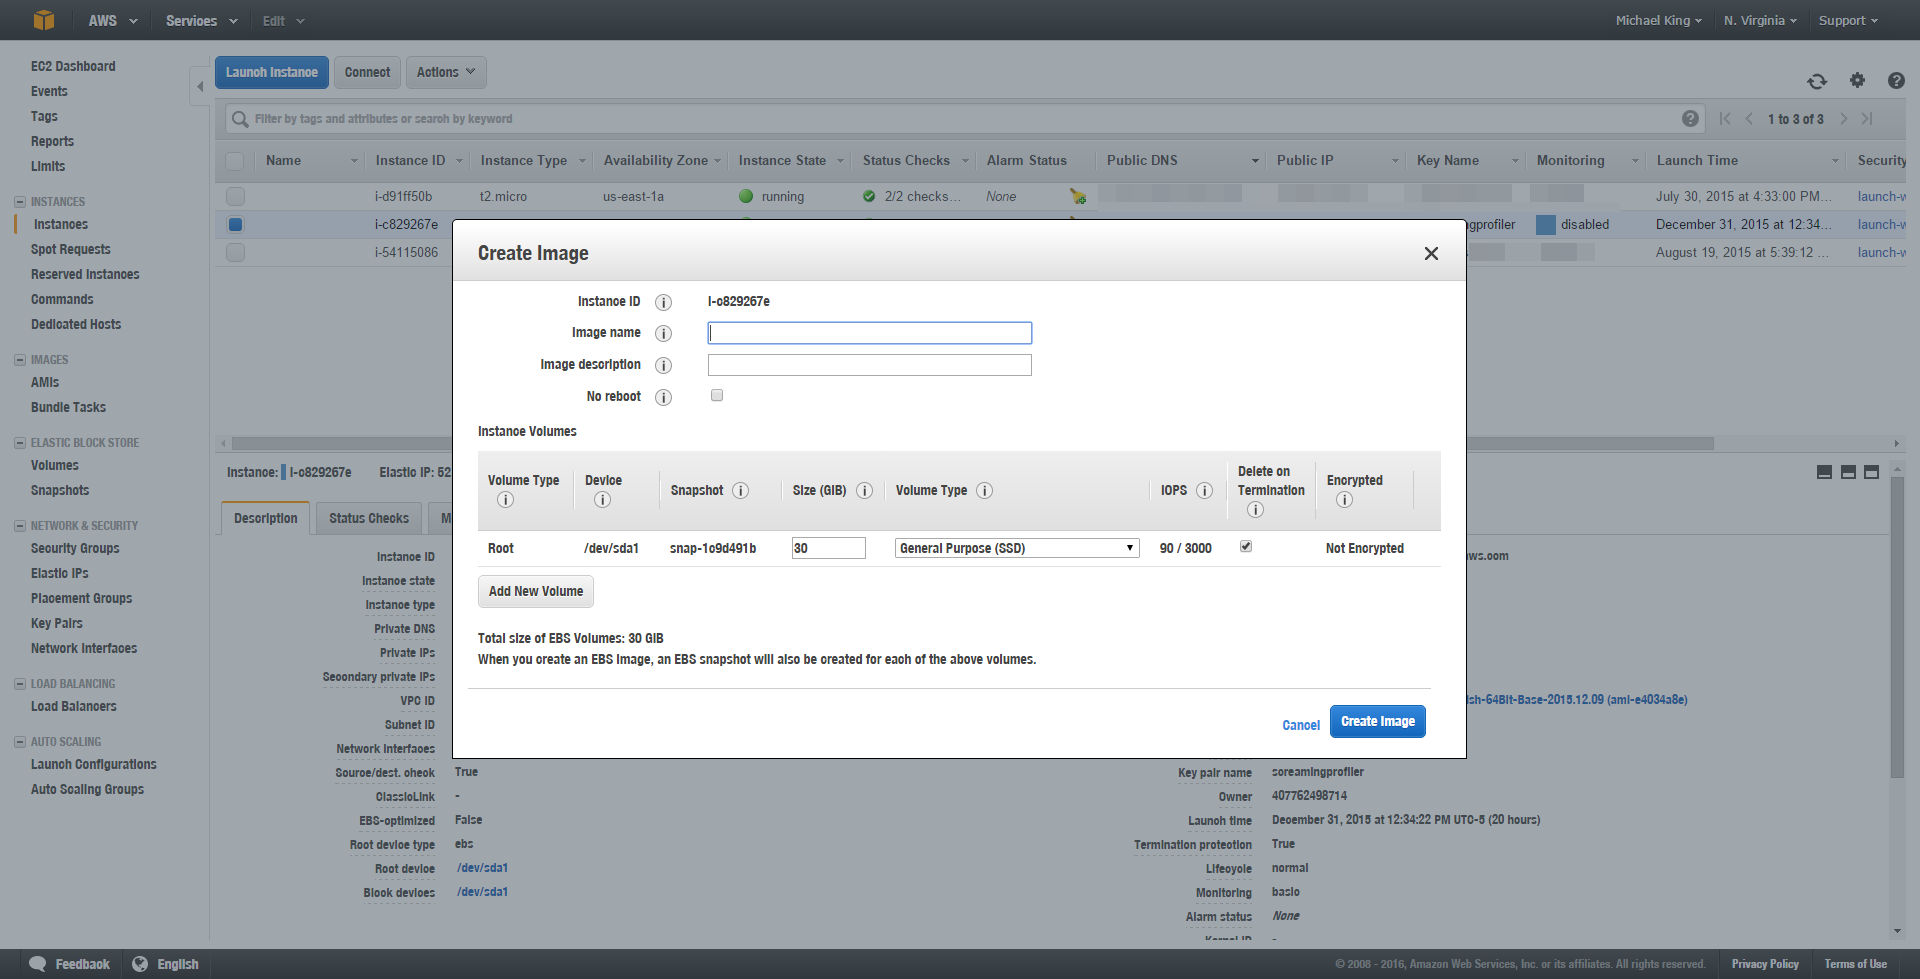
Create an AMI Image – Now that your instance is completely configured, we’ll want to create an image of it just in case anything goes wrong or you want to create several instances of your box if you need to run multiple high-octane crawls at once.
Give your image a name.
Now You’re Ready to Roll
While I don’t know the limitations of this configuration, I’m currently looking at it in the middle of a 20 million URL crawl. If you run into any problems you can always go to the bigger instance for more memory. Ideally, you’d be able to add bigger volumes (hard drives) to the instances the programs could lean on virtual memory, but from tests and the documentation it appears that Screaming Frog and URLProfiler only use physical memory. Effectively, you are limited to whatever the maximum memory configuration (244 GB in case you’re wondering) can hold at once. For reference, Screaming Frog’s documentation specifies that “Generally speaking with the standard memory allocation of 512mb the spider can crawl between 10K-100K URI of a site. You can increase the SEO spider’s memory and as a very rough guide, a 64bit machine with 8gb of RAM will generally allow you to crawl a couple of hundred thousand URLs.” While I’m skeptical of that number based on those specs, assuming 8GB gets you 200k URLs, then 122GB should get you 3.05 million URLs.
Additionally, the beauty of Remote Desktop is that you can start the crawl, close the window and then remote back in later and it will have kept running the entire time. Remember that Amazon Web Services charges you by the hour, so don’t forget that you’re running an instance if you’re concerned with what you’re spending. Which brings me to my next point…
What’s this Going to Cost Me?
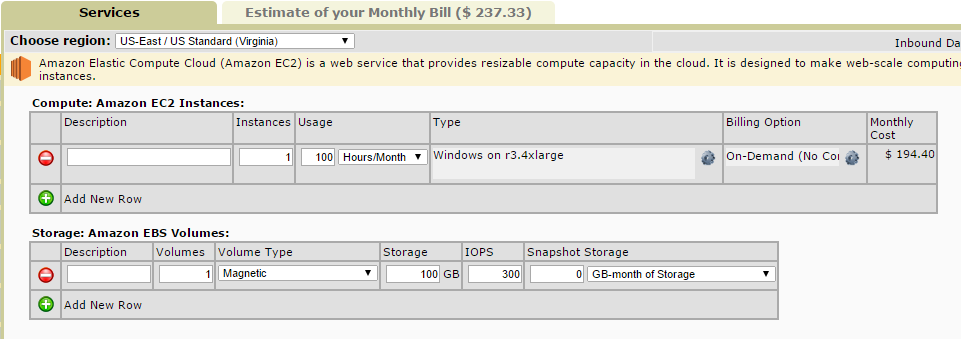
Amazon’s pricing is completely dependent upon your configuration and they have a price calculator as well as the spending alert system to help you stay on top of it.
Based on the configuration that we’ve chosen, if we left it up for 100 hours (a little over 4 consecutive days) per month, it’d cost $237.33. Providing you could crawl 3 million URLs in that time period (site speed and throttling dependent) that’s far cheaper than the $2980 that DeepCrawl charges for 3 million URLs with their pay as you go plan.
Wrapping Up
Naturally, there are different plans that cloud-based crawlers offer and they do a lot of the work for you or you could just build a maxed out machine that just runs Screaming Frog and URLProfiler and save money. Or you could run Screaming Frog on a linux box to save more overhead and potentially run on a smaller instance, but I’m guessing that if you could, you’re probably not reading this post. Either way hosting Screaming and URLProfiler on AWS is a great short term solution when your Desktop crawl needs more power.
Now it’s your turn. I’d like to hear how you’ve overcome the limitations of desktop crawling in the comments below!