Google regularly rolls out features that make me feel like a visionary. Ok wait. To be fair, they also rollback features that make me feel more like an angry old man shaking his cane at the sky. Content Groupings for Google Analytics is one of those features that goes with the former.
If you’ve seen me speak on content or personas at any conference in the past four years, you’ve likely heard me say something to the effect of “not all content is created equal. You should prepare KPIs with regard to where people are in their user decision journey. For example, you shouldn’t measure an infographic based on sales.”
I usually say that while this visualization is being projected behind me.
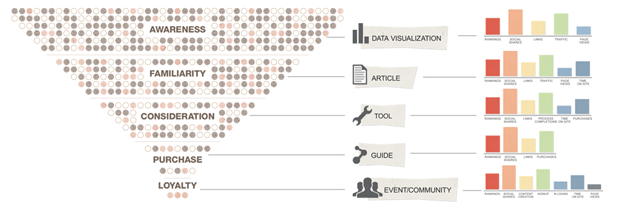
It’s illustrating a model of how different pieces of content fit in different phases of the user journey. For instance, an interactive tool, such as a mortgage calculator, is likely to be in the consideration phase of that buy cycle. It may lead to an immediate sale, but it’s more likely not to. Whereas a buyer’s guide is lower funnel and far more likely to lead to that immediate sale and therefore will have a primary key performance indicator (KPI) of sales.
All of this would normally be pretty confusing to determine and require a ton of tools and VLOOKUPs to report on. The good folks on the Google Analytics team rolled out a Content Groupings feature that allows you to effectively do this with a little setup, but not much effort.
Granted, this is probably not how Google intended the feature to be used, but what are we if we can’t be creative?
What are Content Groupings?
To paraphrase how Google explains Content Groupings, they are basically a logical categorizations of content within a site based on a specified ruleset or tagging structure. To determine which content group a page falls into, you can extract features from URLs or page titles using regular expressions or identify groups by tracking code, or use another set of rule definitions.
Here’s how it could potentially look on a standard WordPress site with posts, homepage, category pages, tag pages, etc.
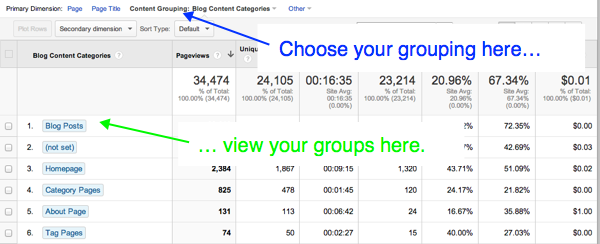
Source: Justin Cutroni
As you can see, Google allows you to review metrics in context of your site’s custom categorization. Thematically organized metrics such as these can drive actionable insights quite quickly. I think you can see where I’m headed here…
Measuring the User Journey
If you’ve been following along with the folks at home with the various methodologies around content auditing, keyword research and persona modeling that I’ve been developing over the years, you can already guess the use cases.
For our clients, we categorize content by the stage in the user journey (also known as need state). In some cases we go with the standard consumer decision journey model, other cases we go with something more specific to the client. It really just depends on whether we did their segmentation and journey mapping or if they already had it. Where content fits is determined during the content auditing process and that data is piped back into GA so we can look at conversions and other secondary metrics based on that.

Thus, when we build reports we can just export from GA with the content groupings and run URL Profiler to get the latest on links, and social shares.
Why Is this Valuable?
Quality reporting is about actionability and Content Grouping quickly helps us understand where to focus content efforts on a period over period basis. Here are just a few examples of how you might apply this.
- Paid Media – If, for a given month, we’re driving traffic to higher funnel (awareness and familiarity) content on the aggregate, but it’s not leading to subsequent visits and conversions and we’re seeing much higher conversion rates on the aggregate for consideration content or vice versa then we can confidently make a dramatic, but data-driven shift in the campaign structure.
- Content Creation – If you’re seeing on the aggregate that a certain type of content is not supporting the stage in the journey that you suspect, then this added intelligence helps you understand what else is working in that group and therefore where to ramp up efforts. For, example if you’re seeing that video content isn’t working for your buy phase content, but blog posts are, then you make the data driven decision to switch.
- Conversion Rate Optimization – In some cases marketers do conversion testing based on a given page type rather than a section. Aligning tests with the user journey can drive actionable insights on how to improve whole sections of content rather than just on the page template level.
- Persona Context – If you’re tracking personas based on Affinity Segments in GA (you should be), then you can see precisely how each segment performs best across content types. That way you can focus all of your off-site activities even further. For example, if you’re finding that your audience segment that aligns with readers of Forbes and Fortune are more likely to convert through referral channels to your consideration phase blog posts, then it’s time to seek out other similar sites for guest posting.
In other words, it’s a means of helping us to simplify analytics and get to the insights. Convinced now? Cool. Let’s show you how to do it.
Setting up Content Groupings in GA and GTM
First step is setting up Content Groupings in Google Analytics. To do so, head on over to the Administration > Content Grouping section of Google Analytics. It’s in the far right column.
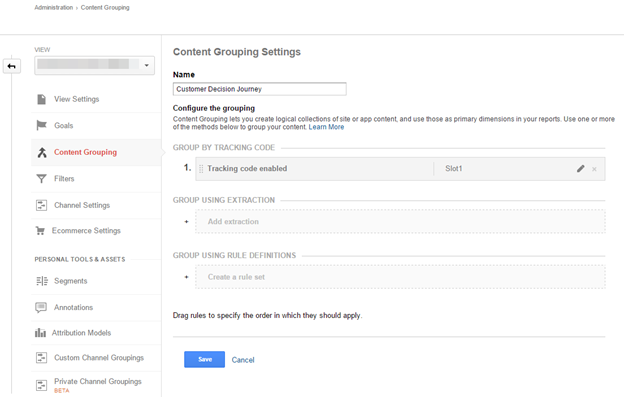
- Click New Content Grouping to create sand configure a grouping called “Customer Decision Journey” and choose Group by Tracking Code.
- Click Enable.
- Select Index of 1
- Click Done.
You’re all set with the GA side of things.
Now, if you’re not already using Google Tag Manager, I encourage you to do so. Otherwise you can skip to the end and find the code for hard coding this specifically for Universal and Classic GA.
I’ll walk you through setting this up in GTM, just in case this is your first time working with it.
- Create a Google Analytics Tag.
Note, if you’re doing this, you’ll need to remove your existing GA tracking code because otherwise your site will be double-tagged and your numbers will be inflated.- You’ll need to select it as a Universal Analytics or Classic GA tag depending on what you’re running. For this example we’ll be using Classic.
- Enter your Web Property ID (your UA-XXXXXXX-1)
- Enable Display Advertising Features (for continued persona tracking)
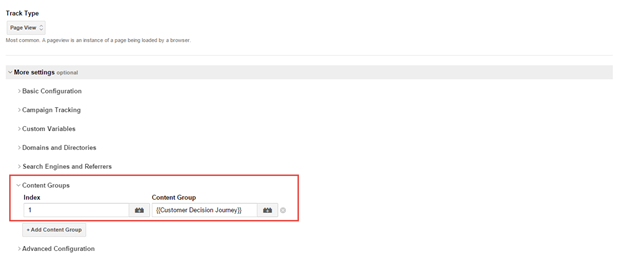
- Set Track Type to Pageview
- Toggle the Content Groups so you can add one.
- Set the Index to 1
- In the Content Group put “{{Customer Decision Journey}}.” This is important for later as it represents a macro.
- Set up a firing rule. Again, just in case this is your first time setting up GTM, you need to set up firing rules on all tags so it knows when a given tag should be executed. Otherwise your tag will never be executed.
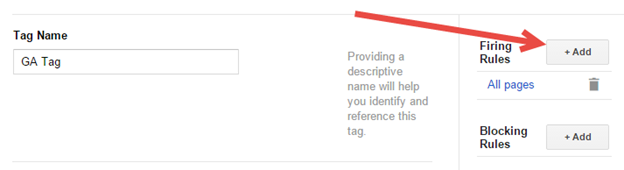
- In this case we want our tag to fire on all pages so we set the Conditions to {{url}} matches RegEx “.*”

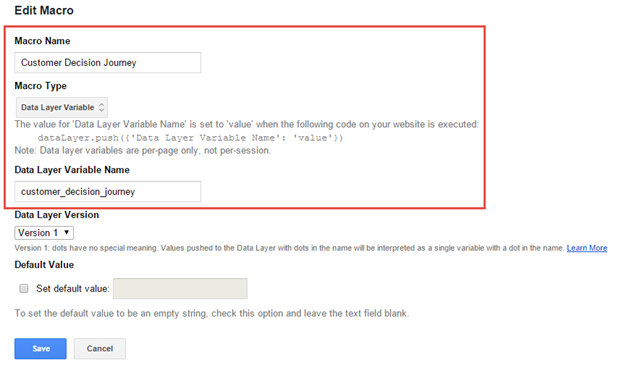
- Setup a macro named “Customer Decision Journey.” This is what the field in the GA tag is referring to. When GTM pulls the data in from the data layer for usage, it is then referred to by “{{Customer Decision Journey}}” within the ecosystem. For Data Layer Variable Name set it to “customer_decision_journey.” This is how the value will be referred to within the website.
Ok, now you’re all setup on the GA and GTM side. Next step is tagging pages in WordPress.
Tagging Content Groupings in WordPress
Out of the box, Google Analytics requires that you’d tag every page either by patterns or by sending data back. However pattern matching doesn’t work so well when you’re talking about something largely as qualitative as the consumer decision journey. Pages still have to be tagged, but you don’t want there to be anything visible to the user such like the standard tagging structure in WordPress.
Luckily, there is a great plugin to support this called Advanced Custom Fields.
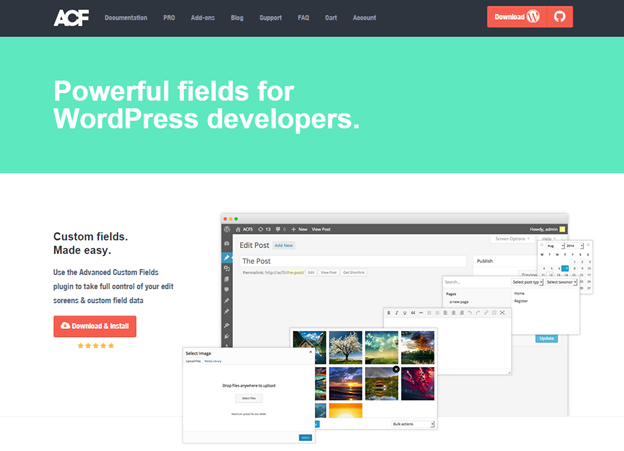
We’re going to use this to add a drop-down to the editing screen of every page so content creators and editors can set the content grouping when they edit their pages and posts.
- Install the plugin
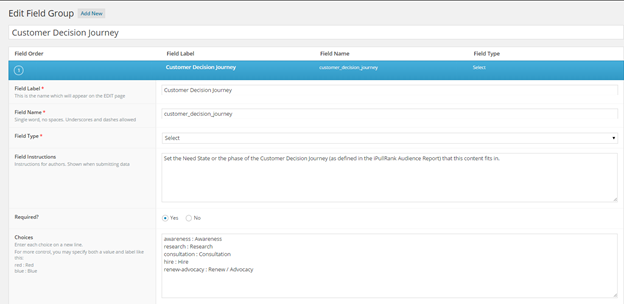
- Add a new field group called “Customer Decision Journey”
- Name the field label “Customer Decision Journey” and the field name “customer_decision_journey.” The latter is particularly important as we’ll be referring to it later.
- Write a field instruction so that content creators know why this field is now there and why it matters. For our clients, we typically refer to the Audience Report.
- Setup the choices as seen below. You need to place a colon between the choice as it’s saved as variable versus how it will be displayed as a variable. For example, if a choice is to be displayed “Loyalty/Buy” it should be represented as “loyalty-buy” or “loyalty_buy” to satisfy programming syntax.
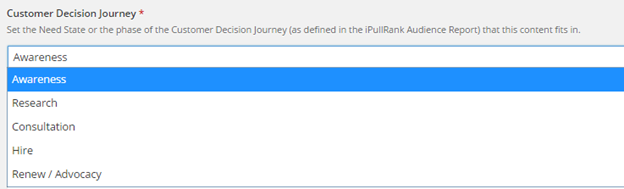
Now you’ll have a drop down that’s available to every page and post.
First, you’ll need to set the Location for your advanced fields by setting Post Type is equal to post and Post Type is equal to page. This will ensure they show on every page and post in WP.

Finally, go to your editor view and move the advanced fields up to just below the post/page title so it can’t be missed by any content creator.
Ok we’re almost there, now we just have to push the data to the GTM’s mysterious data layer. This is the part where it gets to be a little technical. Hold on to your mouse!
Setting Up the Data Layer
Google Tag Manager is advertised as a solution for analytics that doesn’t require code. That’s not completely true. In a lot of cases you need to know how to code and at the very least you need to understand the DOM (Document Object Model) and basic JavaScript to pull data into what’s called the “Data Layer.”
The term data layer makes it sound more intimidating than it is. It’s just a fancy name for a specific JavaScript Object.
After you’ve created your GTM account you should install DuracellTomi’s Google Tag Manager plugin. The guy is named after a battery so you already know this is going to supercharge your site!
The next step is adding a little code to your header.php file. You can do this in Appearance > Editor. The code below pulls the need state that you’ve set with the Advanced Custom Fields from the WordPress database and then pushes it to the data layer.
[cc lang=”javascript”]
var needState = “<? echo get_field(‘customer_decision_journey’); ?>”;
dataLayer.push({“customer_decision_journey”:needState});
[/cc]
Alternatively, if you want to ensure nothing goes wrong due to any errors that get_field might potentially throw or you just want to set a specific value for anything that hasn’t been categorized, you can do the following:
[cc lang=”javascript”]
var needState = “<? $needState = get_field(‘customer_decision_journey’); if (isset($needState)) { echo $needState; } else{ echo ‘uncategorized’; }?>”;
dataLayer.push({“customer_decision_journey”:needState});
[/cc]
If you’re not using GTM you can push to GA Classic this way:
[cc lang=”javascript”]
var needState = “<? echo get_field(‘customer_decision_journey’); ?>”;
_gaq.push([‘_setPageGroup’, 1, needState] );
[/cc]
Also, if you’re using Universal analytics you’d use the following:
[cc lang=”javascript”]
var needState = “<? echo get_field(‘customer_decision_journey’); ?>”;
ga(‘set’, ‘contentGroup1’, needState);
[/cc]
Be Amazed by Your Reporting
Now you’re set up to do intelligent reporting based on need states with custom fields acting as your means of enforcement (hello scale!). You’ll never have to under the hood again, unless you switch WP themes.
As with any modeling of the funnel or user journey there are, of course, caveats. Some content may fit multiple phases of the journey. Your attribution model should ultimately dictate where the value of the conversion is placed. Analytics itself is an approximation and therefore inherently imperfect.
Nonetheless, this has been a wonderful way for us to map our persona-driven process to analytics. Now it’s your turn – what are some good uses cases you’re seeing with content grouping?

- How iPullRank Would Migrate Overstock.com to BedBathAndBeyond.com - August 4, 2023
- Generative AI Still Requires Content Strategy - May 16, 2023
- Relevance is Not a Qualitative Measure for Search Engines - April 20, 2023